Tuesday 15 January 2019

Butterfly Canvas for Lindy's Gang

Hello Lindy's Gang! Happy New Year to you all! Today I am sharing a Butterfly canvas using Lindy's fabulous Magical Shakers to create my background and some gorgeous embossing powder to give my chipboard a lovely textured shimmery finish. Lets get started!

12(1)

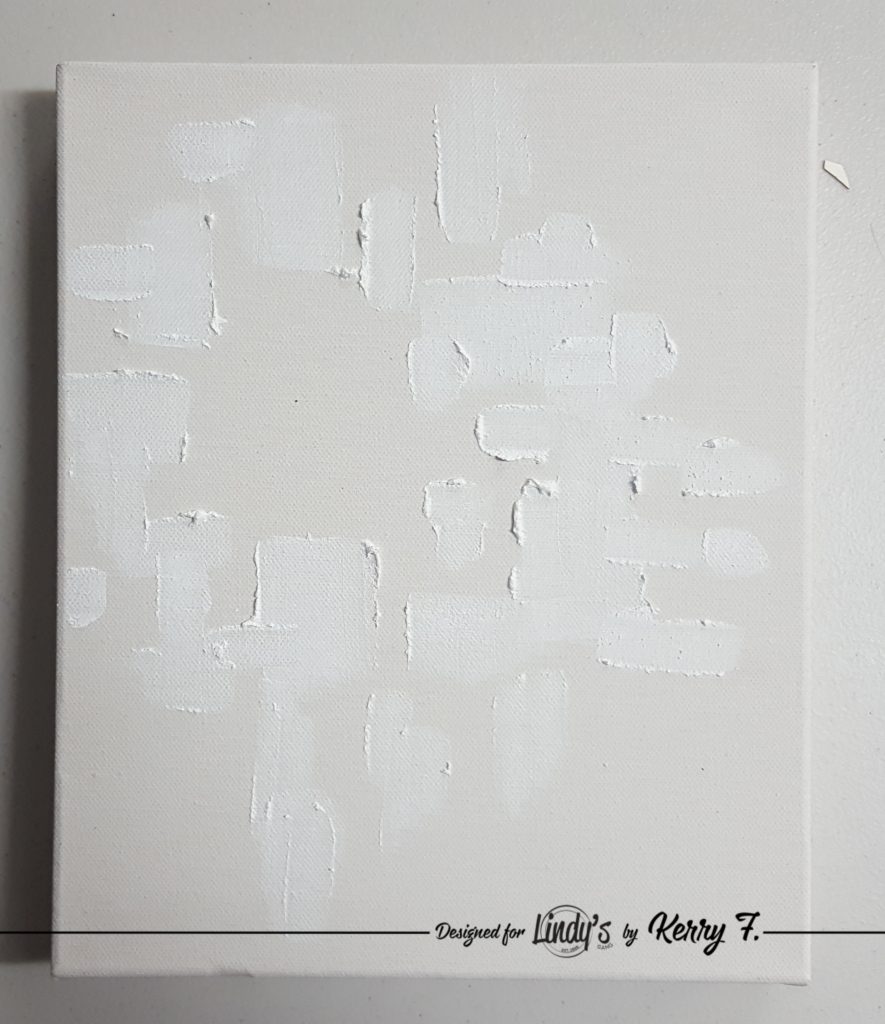
To start, apply some texture paste horizontally and vertically to the canvas, I have left the upper left space empty as this is where my focal point will be and then added the paste more sparingly toward the edges.
1(1) 

Before allowing the paste to dry,  add some chipboard to the canvas using a matte gel medium and then leave to dry.

2

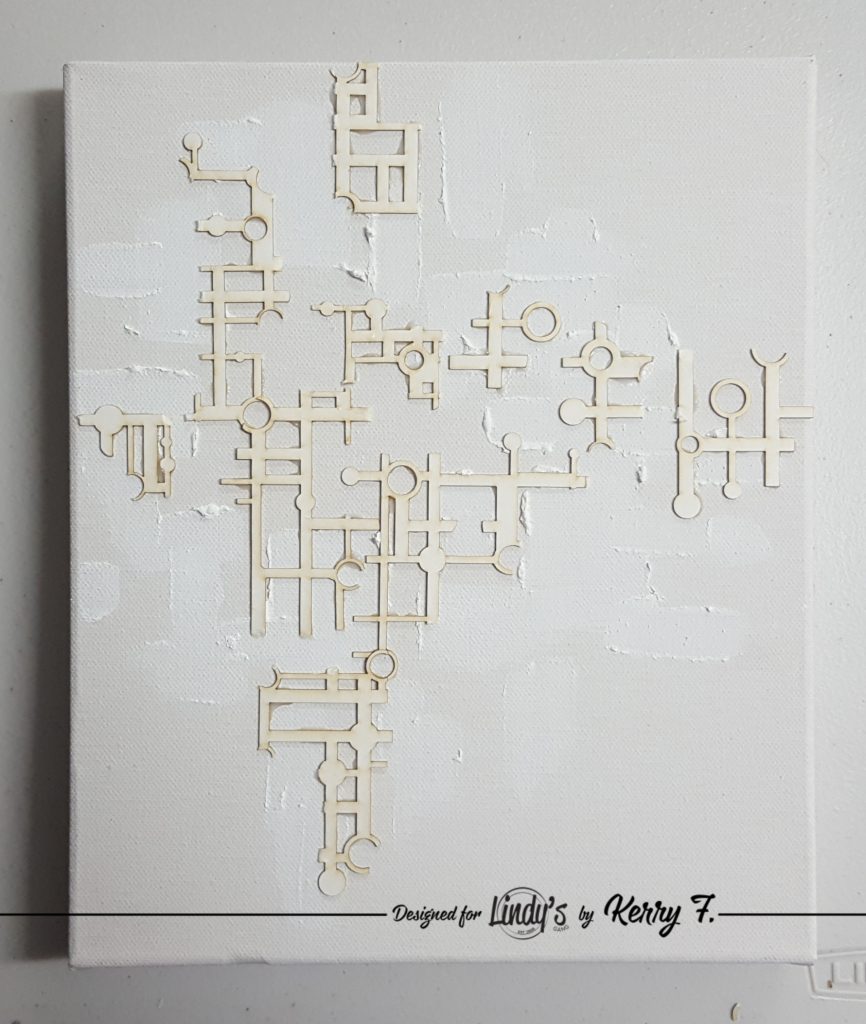
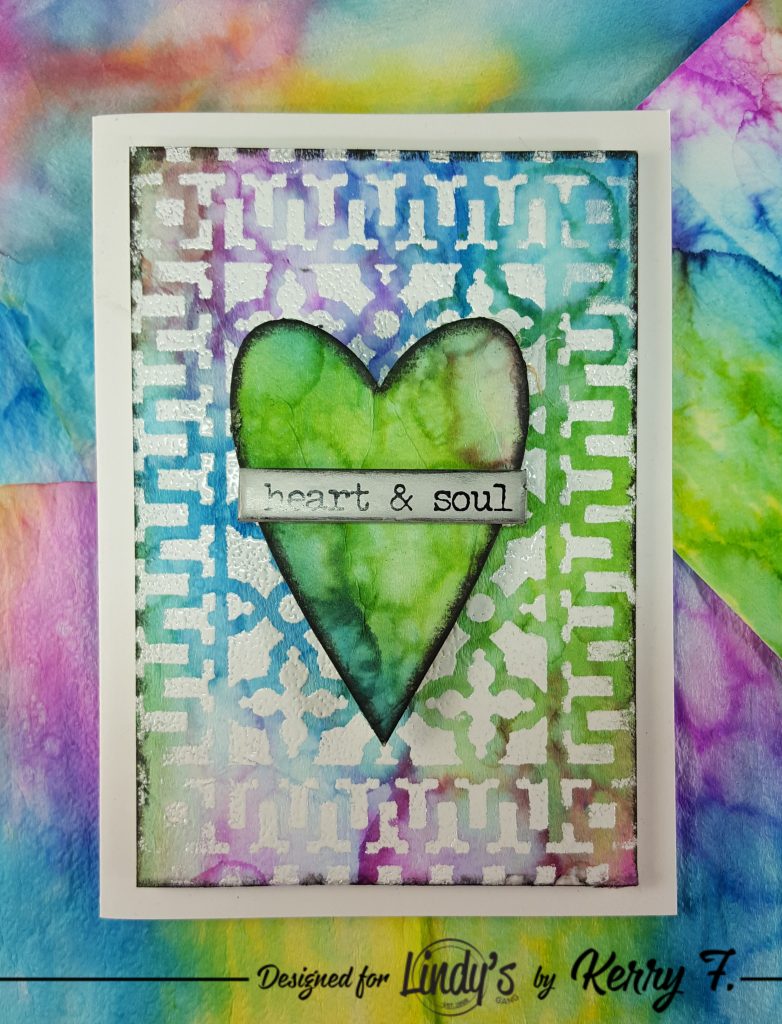
Using archival ink and stamps,  add some more interest to the background....

3

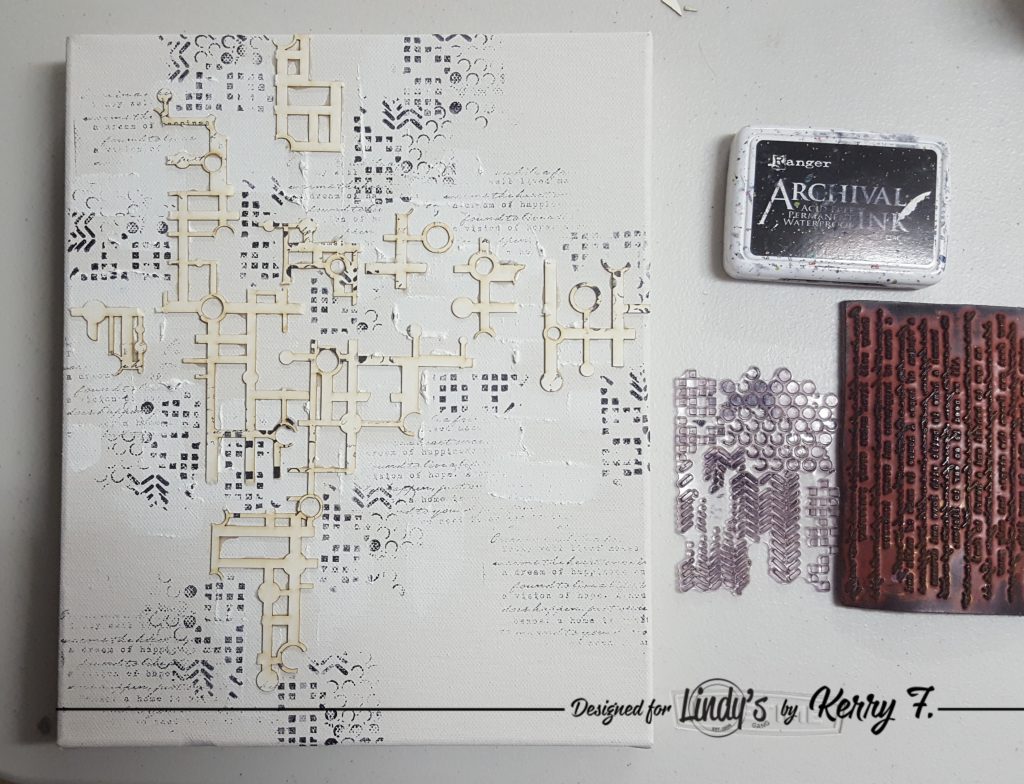
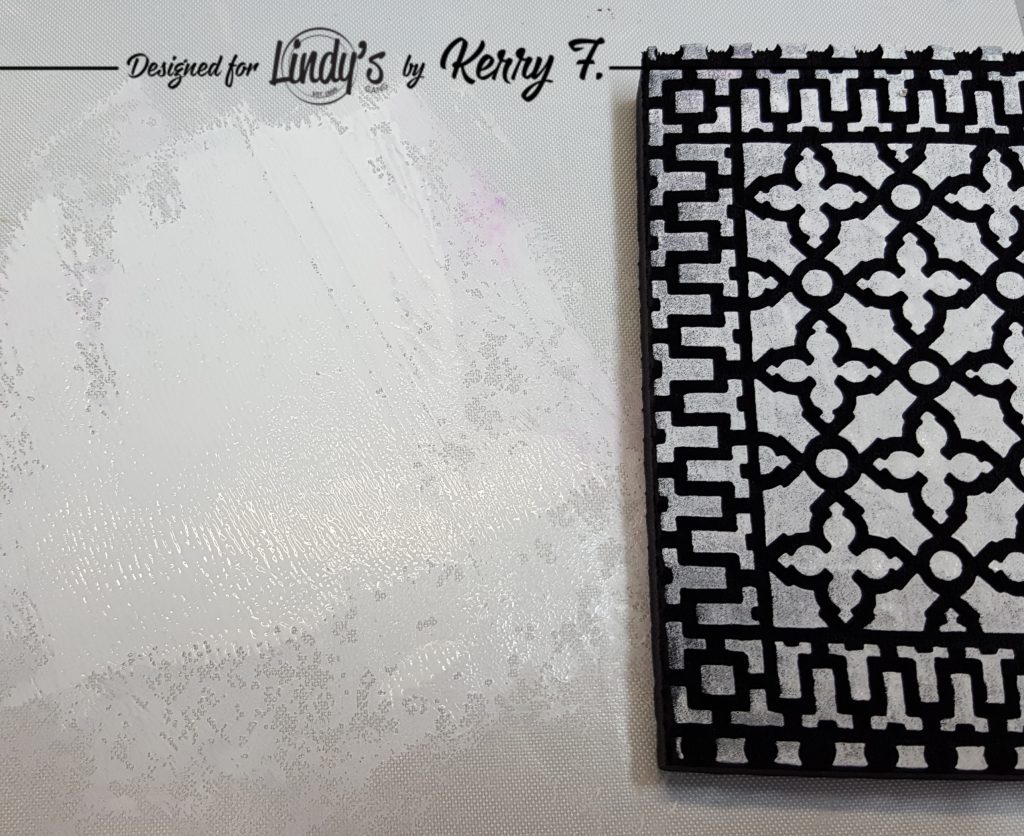
...and then give everything a good coat of white gesso and dry throughly.

4

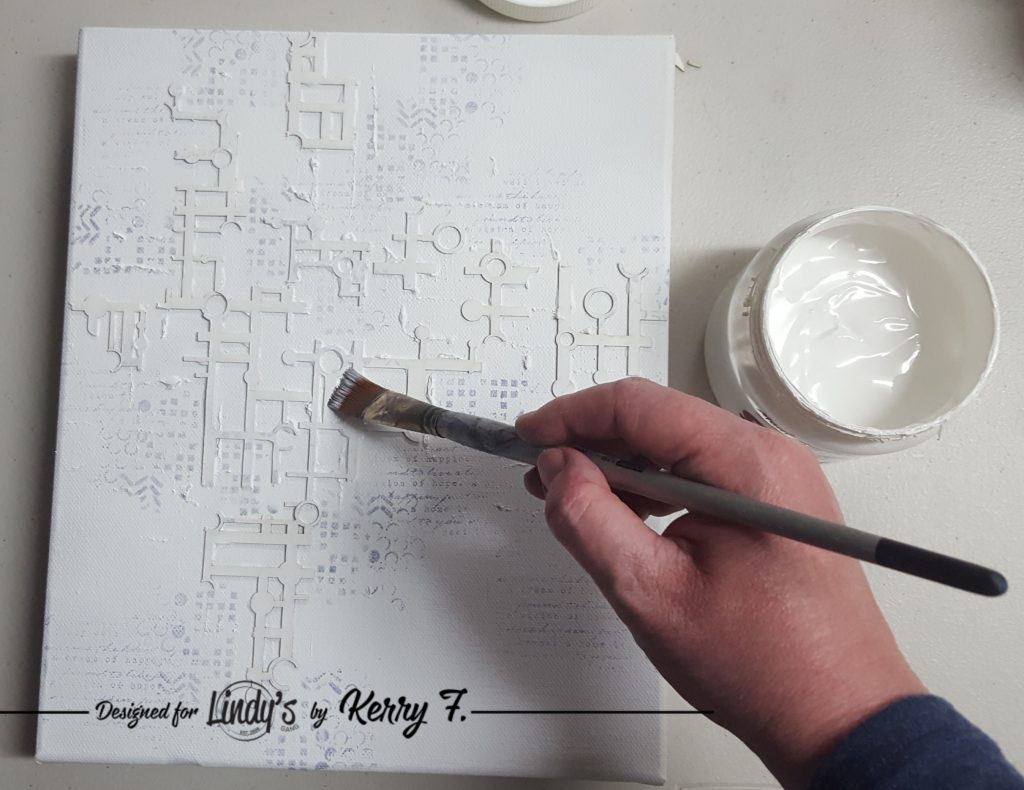
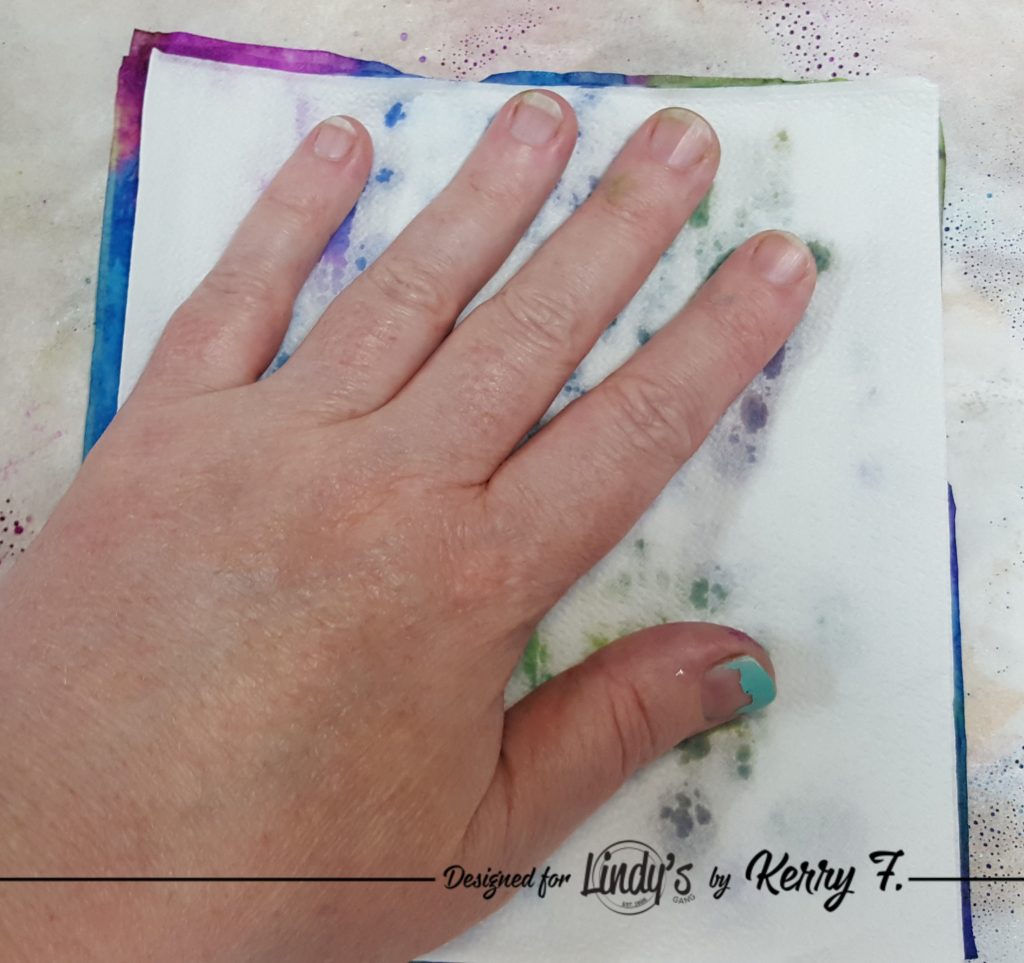
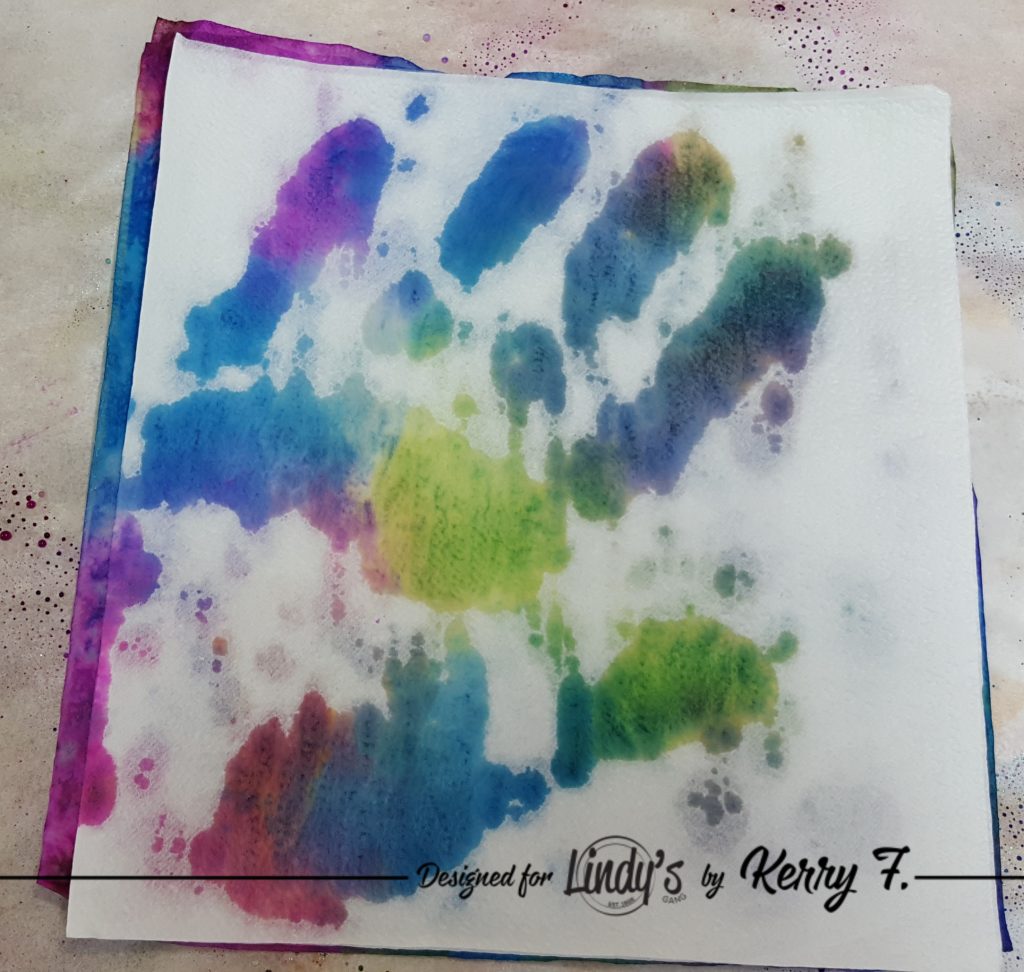
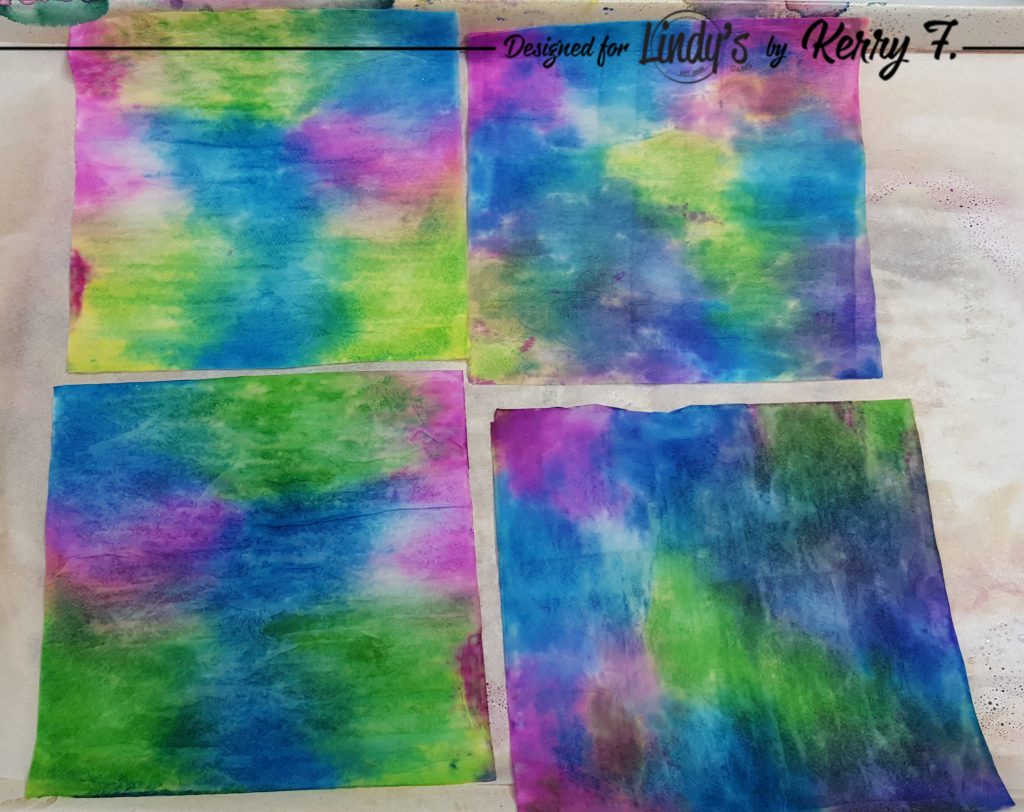
Now grab some magical shakers, I wasnt sure which colors I would use, so I grabbed a few...LOL

5

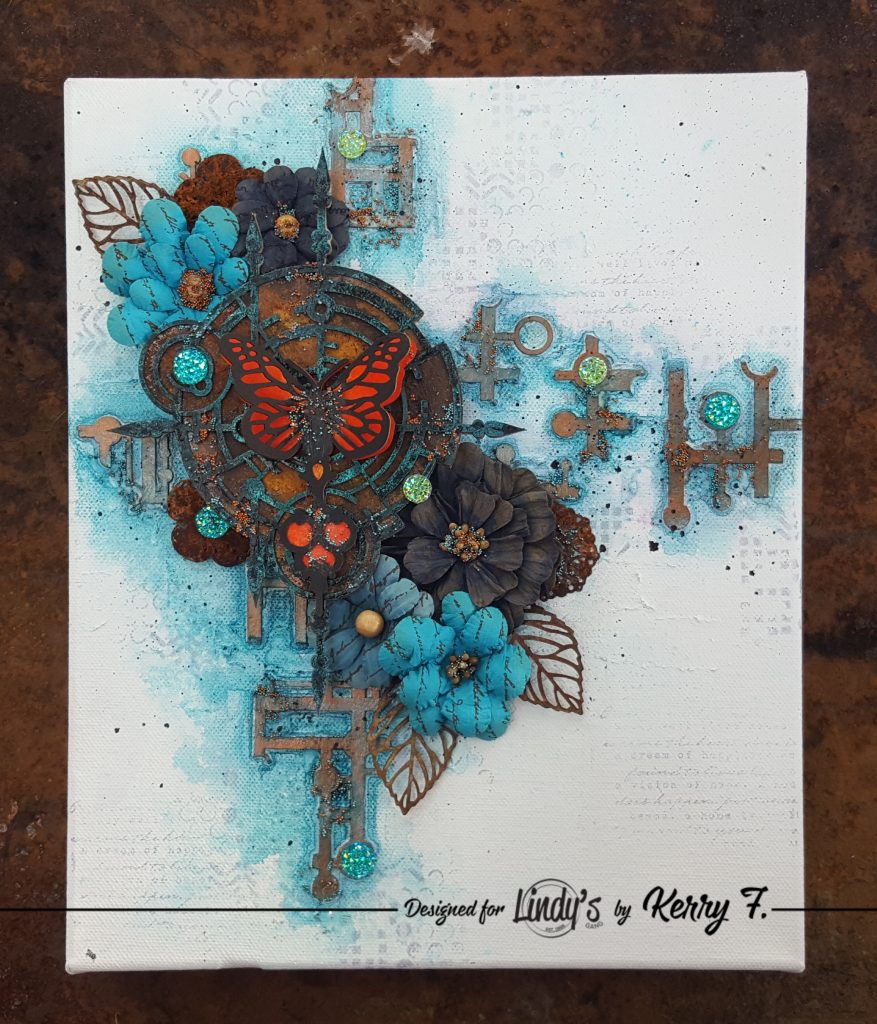
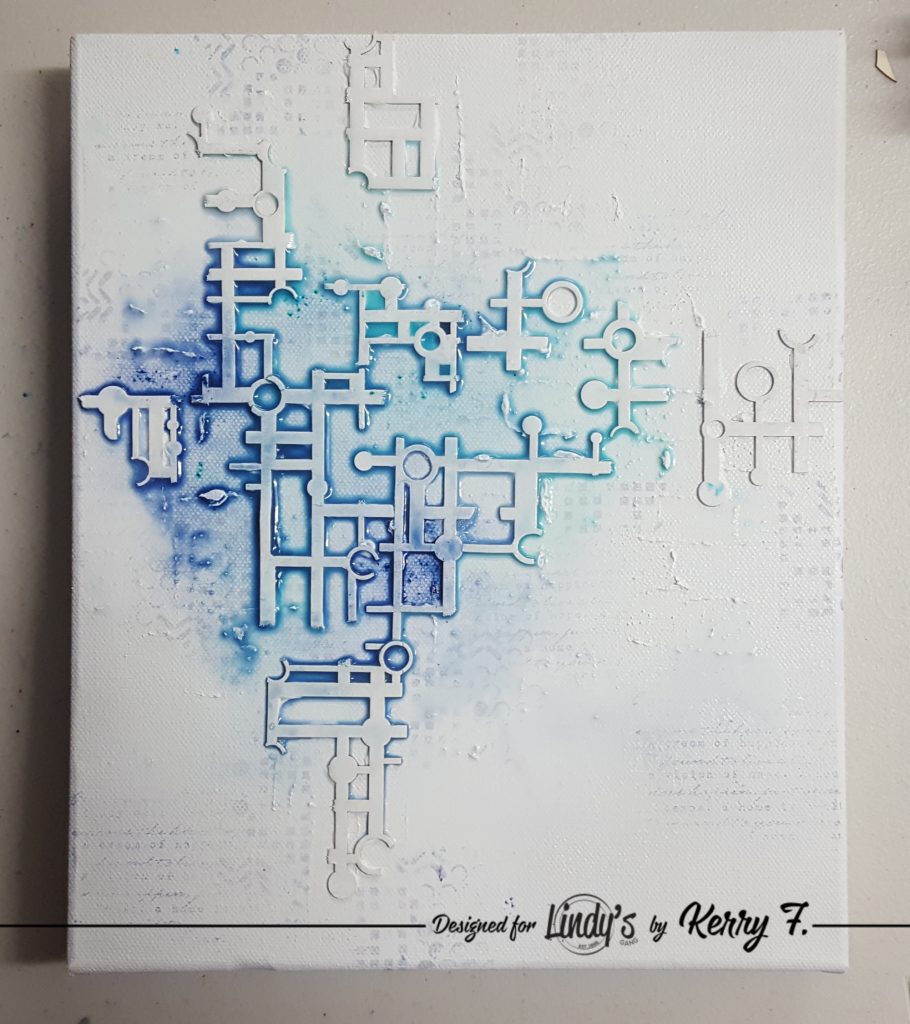
To begin, mix some Guten Tag Teal and Bavarian Blue with some water in a palette and using a brush add the color to the canvas. I also added some Autumn Maple Crimson which gave me a lovely purple. Allow this to dry completely.

6

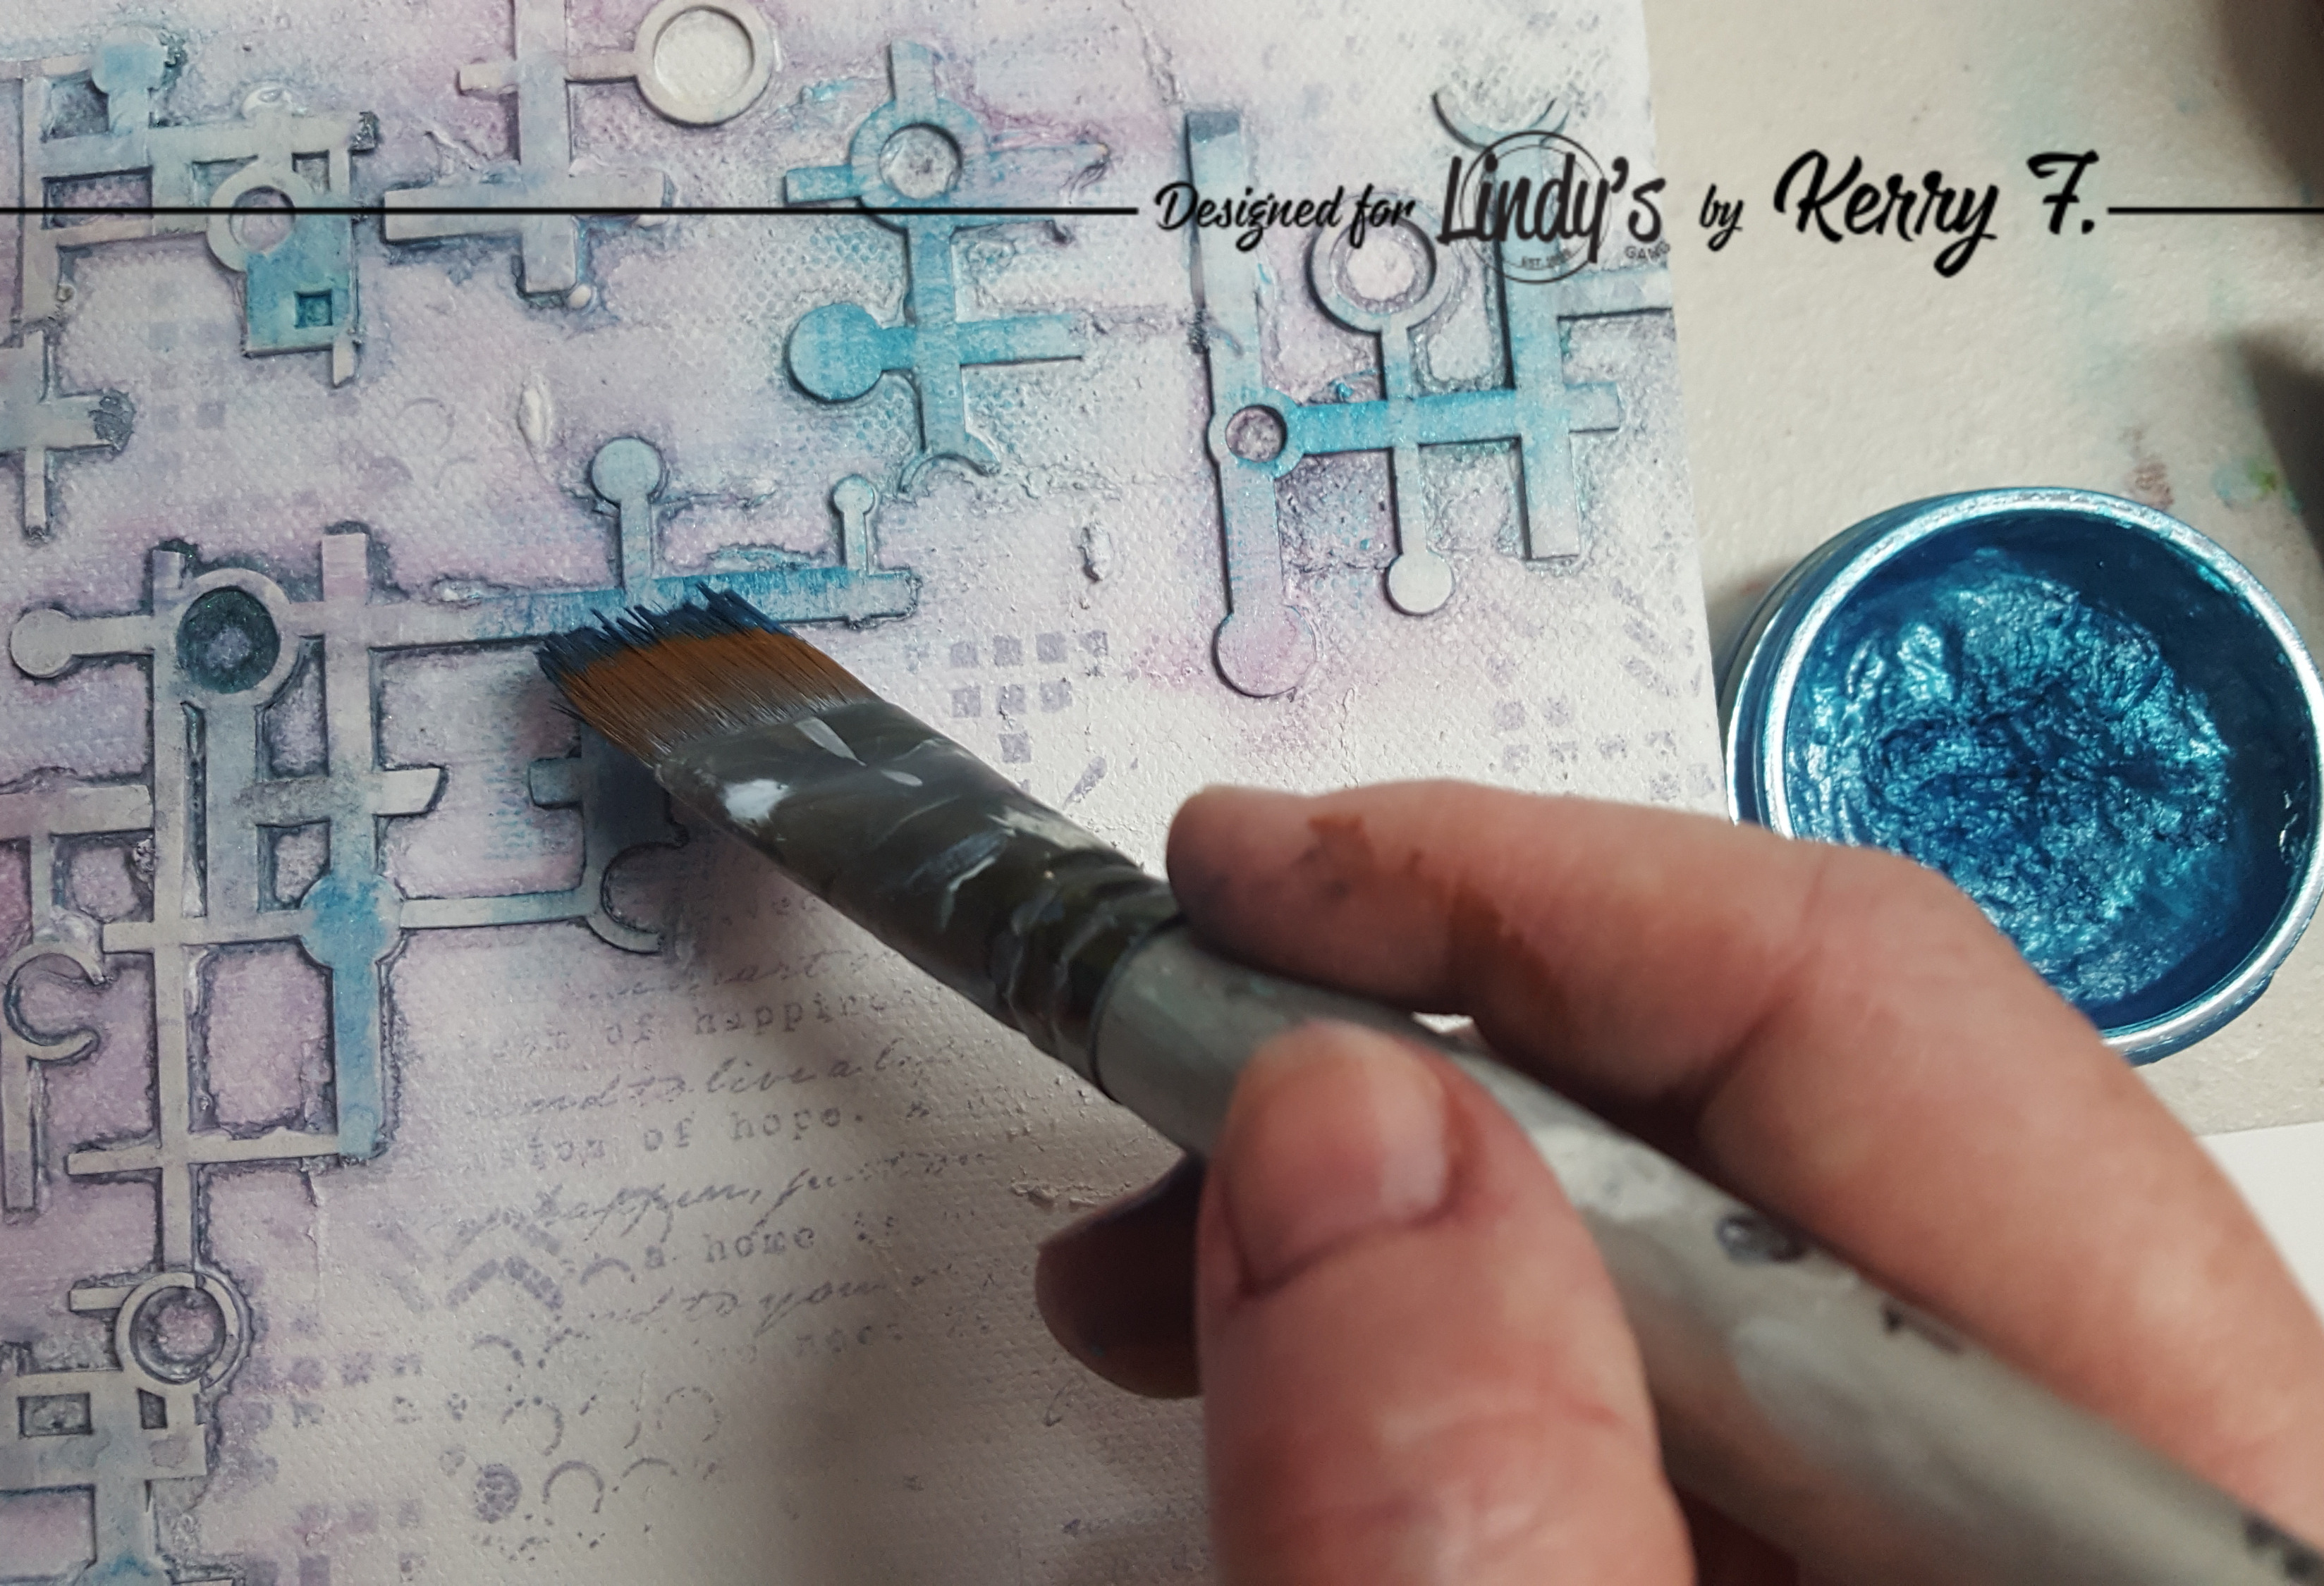
Add some metallic gilding paste to the chipboard in copper and blue....

7

...I felt my background was a little light, so I added some Time travel Teal for added depth.

9

Once this is dry,  splash some black ink onto the canvas.

10

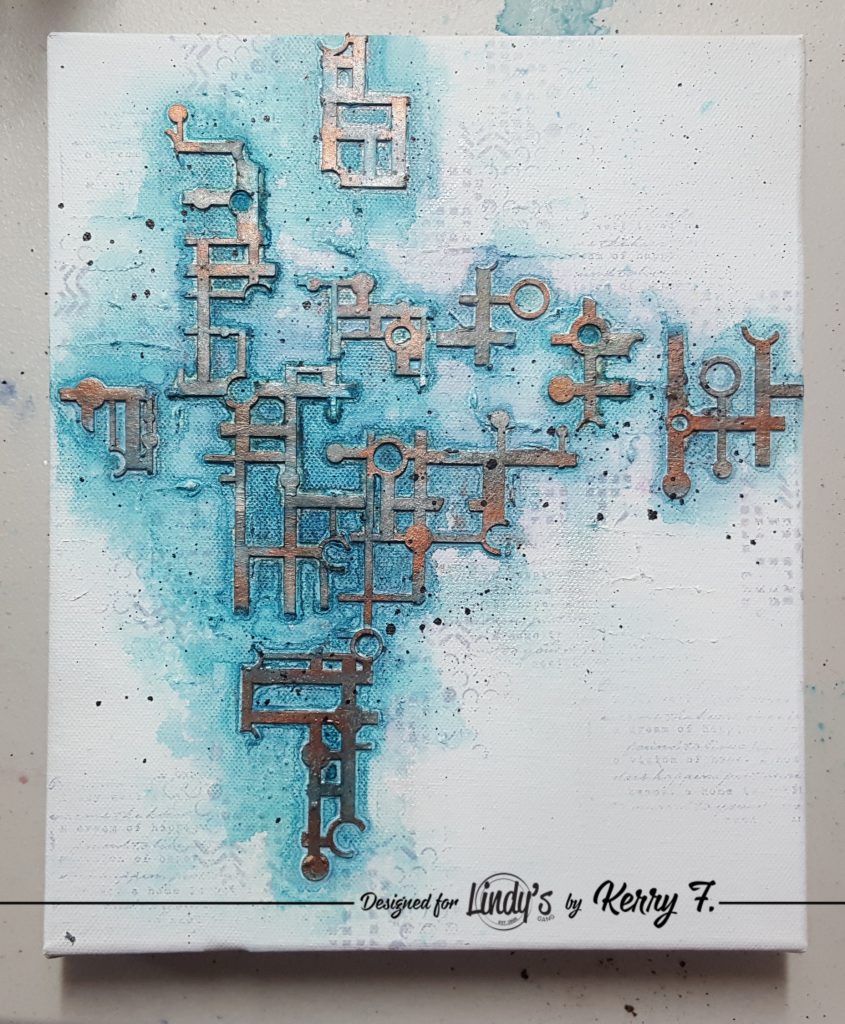
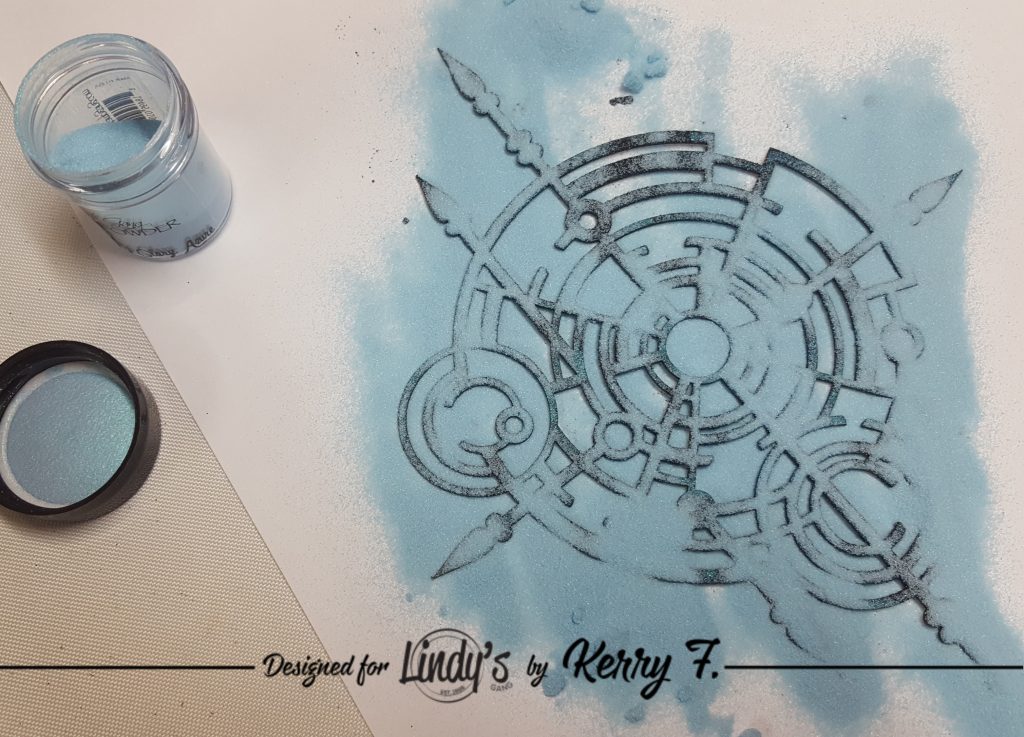
To give the focal point some texture, paint the chipboard with black paint, whilst the paint is still wet, add some Morning Glory Azure embossing powder, when drying with the heat tool, the paint will bubble and give additional texture whilst melting the embossing powder


8

To finish off, layer with flowers, gems and a few old rusted items. I have used a gorgeous chipboard butterfly pin from my stash as the focal point and a smattering of microbeads for extra detail.


12(1)

Lindys Products: Guten Tag Teal shalker  Bavarian Blueshaker  Autumn Maple Crimson shaker Morning Glory Azure embossing powder
Other Products: Canvas, Whichcraft Chipboard, Gel medium, texture paste, gesso, flowers, gems, stamps, archival ink
Thanks for dropping by and have a magical day
Lindys Blog Designer badge 2019 Kerry

Monday 7 January 2019

Batik Inspired Napkins featuring Lindy's

Hello Lindy's Tribe.  A Happy New Year to you all!! And a happy new obsession for me... Batik! I love it, the patterns, the colors, designs, I just cant get enough. The fabric that comes from Indonesia is AMAZING and has totally inspired today's project. I have to send a big shout out to my Mum, Anne, who showed me this fabulous technique, and I am sure you will love it just as much as me. For this project you will need 3 of your favorite sprays, I have chosen Urban Amethyst, Hydrangea Blue, Drop Dead Gorgeous Green and some purely white embossing powder.

14

To begin, take your sprays and some plain white single ply napkins.

1(1)

Leave the napkin folded into quarters and spritz moderately with water on both sides, you may see the napkin warp with the water.

2

Next, add your sprays to the napkin, if you choose colors that are next to each other on the color wheel, they will blend nicely to give you additional colors. Blue will work with purple or green so iI have no problems there, however I have been more careful with the green and purple, as these will make brown if they mix.

4

Spritz the now colored napkin with more water, you can be quite liberal. Place a new napkin ontop of the colored napkin.

5

Use your hand to help the color seep into the top napkin

6

Keep gently pressing with your fingers until all of the top napkin is colored too.

7

After you have absorbed the color into the additional napkins you should now have napkins that look something like this. Take your heat gun and gently dry the napkins, turning the napkin will help dry all the layers.

8

Once your napkin is reasonably dry... flick large droplets of water back onto the napkin, I know, I know, you just dried it, but this will give some awesome effects, and then dry off again.

9

Now that our napkin is all dry we can open it up to see the difference in the layers, the bottom left corner in the image below was our top layer that had the sprays directly sprayed onto them, you can see the shimmer sitting on the surface. The bottom right image was the back of the napkin, that had some water drips directly to it. The two top sections of the napkin in the picture have a more ethereal look as these were in the middle of our folded napkin.

10

Much like tissue paper, the napkin is very thin and fragile. To make it more durable, use a glue stick and apply the glue directly to a piece of cardstock, then lay the napkin over the top to adhere it to the card. You can now use it as a card base or die cut it for example.

11(1)

These beautiful backgrounds are perfect as they are, but here is a couple of examples of what you can do with them. Take an Art Foamie stamp and add some white paint to the stamp.

12(1)

Stamp the paint onto the Batik background and then sprinkle Purely White embossing powder onto the wet paint and heat set, this will make the white image nice and bright white and also add a little more texture.

13

Cut out the stamped image and layer with a heart for a simple card.

15

For the second card, simply cut a strip of the background and adhere it to one side of the card base, add some stamping, a few splashes and some coordinating flowers. Easy Peasy!

16

Lindy's Products purely white Urban Amethyst, Hydrangea Blue, Drop Dead Gorgeous Green
Other Products: Art Foamie, acrylic paint, napkins, cardstock, flowers, glue stick
Thanks for dropping by and have a magical day xx
Lindys Blog Designer badge 2019 Kerry