Saturday, 18 June 2016

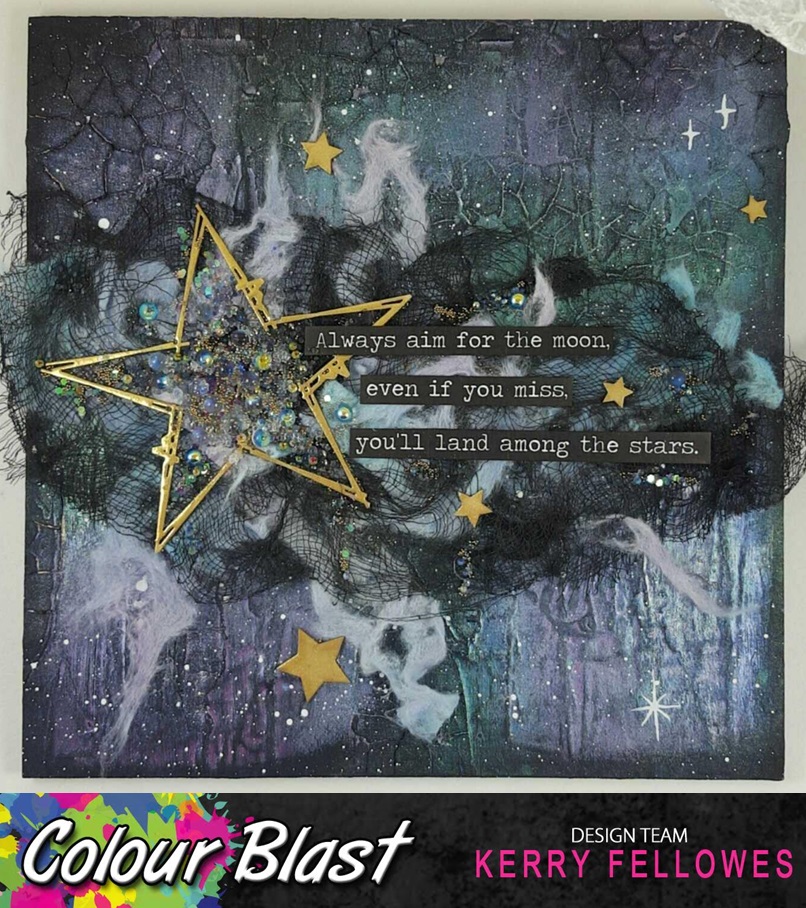
Aim For The Moon - For Colour Blast

Hello, Its Kerry here.  I have been inspired by all the galaxy projects I have been seeing.  I had this wooden panel in my craft room, I had painted it previously but never liked it so it sat in my UFO (unfinished object) box.  It had this great cracked texture, so I prepared it by giving it a good coat of black gesso.


 I started liberally spraying the shimmer sprays in 'Rose petal', 'Deep Water' and 'Singin the Blues' and dried it thoroughly.


 Once dry, I used a dauber and some white gesso to give some 'cloud' like areas to the panel.


 Next I used one of my favorite craft supplies... baby wipes :)  I sprayed the baby wipe with 'Bling', 'Rose Petal', 'Singin the Blues', 'Deep Water' and 'Snow white' and dried this thoroughly also.


Then I tore the baby wipe into small strips.


 Using the embossing powder in 'Bling' I embossed some Whichcraft chipboard embellishments.


To put it all together I flicked some 'stars' with white ink on the background and painted a few with a fine brush. I layered my baby wipe with some black gauze.  I attached the embossed stars and frame and printed this quote (one of my favorites, some people say its by NV Peale, other sources say W Clement Stone). A sprinkling of glitter and microbeads and we're finished :)


Thanks for dropping by :)

Saturday, 4 June 2016

Wishing in the Rain - for Colour Blast

Hello.  It's Kerry here again with another journal page.... with yes, more fairies...LOL!

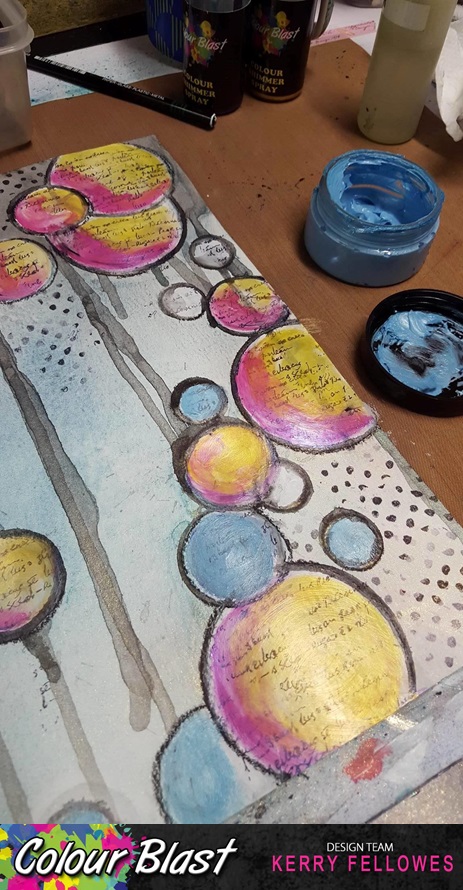
This time I have started with the Colour Blast Embossing Powder in  'Deep Water', 'Dusty Charcoal' and 'Bling'.  I have used some different sized lids for some circles. and embossed the circles on some 300gsm watercolour paper.


I then sprayed some shimmer sprays in 'Bling' and 'Deep Water' on the background of the page and sprayed the 'Dusty Charcoal' heavily on one end and allowed the drips to run down the page.


I used some white gesso to bring my circles back to the front of the page.

I stamped some text into the circles and some dots on the background with some Black Archival Ink and highlighted my circles with a Black Stabilo All pencil.


Using my fingers, I coloured in the circles with the pastes in 'Sunshine', 'Singin the Blues' and 'Rose Petal'.

Then I highlighted the circles with the 'Snow White' paste. 

I added some Whichcraft mini fairies and wish title.


I finished off with some more stamping and a bit of glitter.


Thanks for stopping by.

Tuesday, 24 May 2016

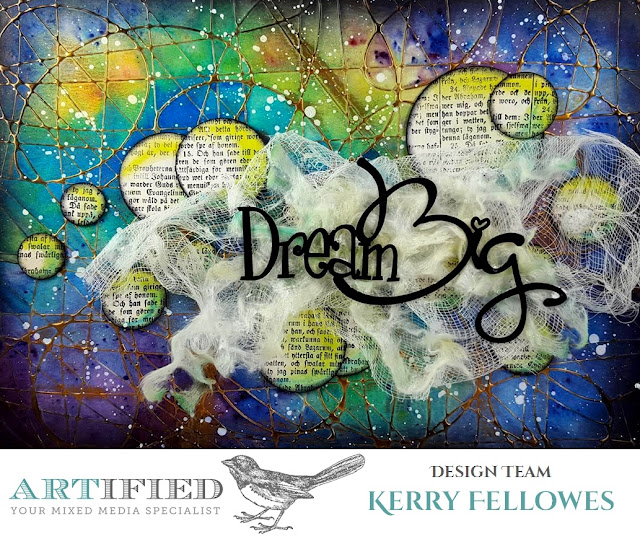
Dream Big Journal Page for Artified

Hello.  Finally I have the 'Brusho' tutorial to show you :)  I Absolutely love this technique and its different every time.  The hardest bit is waiting for the glossy accents to fully dry... LOL

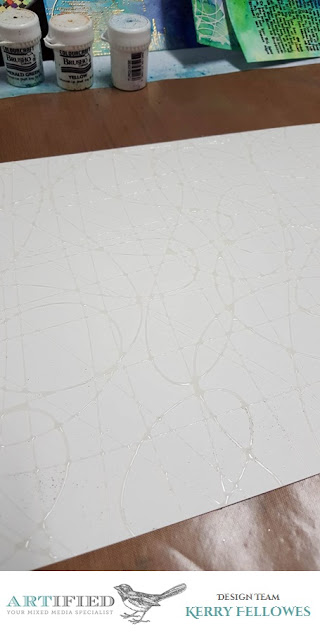
You will need some glossy accents and watercolour paper to start with.

Using the 'Glossy Accents' like a pen draw random squiggles all over the page.  I know this next part is hard, but you must leave this to fully dry. I did mine just before I went to bed and they were ready for me to play with the next morning.  Do a few pages because you will want to play with more than one ;)
 
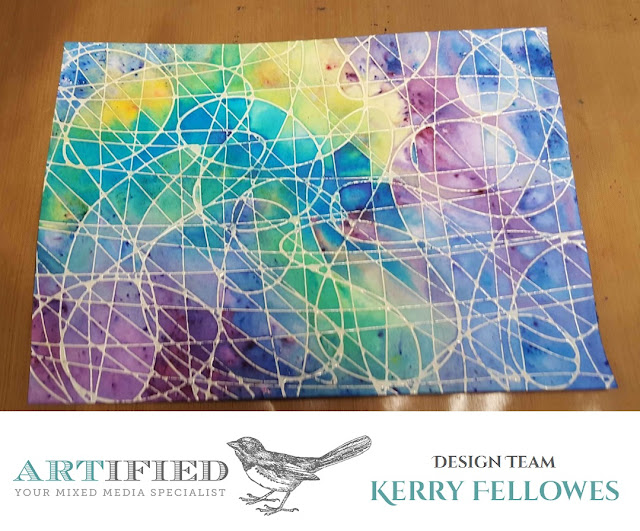
 Next, start sprinkling the 'Brusho' powders on the page.  These are highly concentrated so you only need the tiniest bit.  If you can see big piles of powder, then you have too much.  Once you have sprinkled the powders over the page, liberally spritz with water.  The colours will intermingle and make new colours and the glossy accents will act like a 'dam' and keep some of the colours separate.  Let this dry thoroughly aswell.
 Once dry it will look something like this...

 
Now its time to highlight the raised 'Glossy Accents'.  You can use Inca Gold, Rub N Buff or something similar.

 I used 'Archival Ink' in Black to darken the edges and added some splashes of white 'FW Artists Ink.
Background complete, now for the embellishments.

 
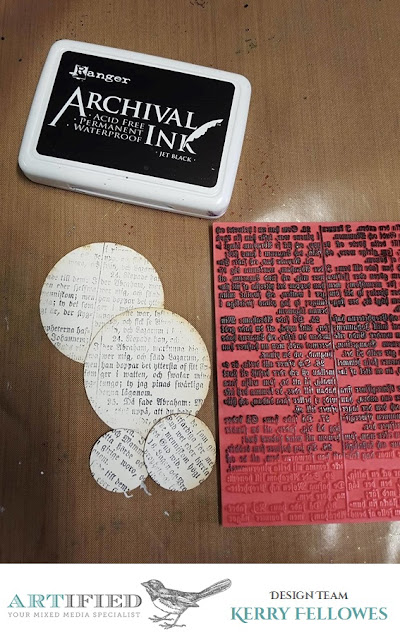
Using my new favorite 'Text Stamp' and black 'Archival ink' I stamped some white chipboard circles.

 
I used 'Gelatos' to add some shading to my circles, and then went around the edges with black 'Archival Ink'


 I coloured the Whichcraft 'Dream Big' title with 'Black Soot Distress Paint'


 I attached the circles and layered the title on top of some gauze.  

You can find all the products HERE.
 

Thanks for stopping by :)

Saturday, 21 May 2016

Love Your Path Tag for Colour Blast

Hello. Its Kerry here again with a tag this time.  For the tag base I am using 300gsm watercolour paper.  Using black archival ink I have stamped some background text.


Using the 'Rose Petal' paste and a little water I made a fluid paint and brushed some onto my tag.


I then added some of the colour to a piece of lace.


I repeated the steps with the 'Royalty' paste.
 

 I glued my colourd lace and some additional white lace onto my tag.


I then took a resin frame and a 'Paper Blooms' flower and an old watch face.  I sprayed a little of the 'Rose Petal' shimmer spray on my non stick craft mat and used a brush to pick up the colour from the mat and a little paste from the tubs to add some highlights to my embellishments.

  I finished off by inking around the edges with black archival ink and a few black ink splashes.  I added some 'Rose Petal' shimmer spray directly on the lace to intensify to colour and added the butterfly and words which were all highlighted with the paste and shimmer sprays in 'Royalty' and 'Rose Petal'

Saturday, 7 May 2016

Live Your Dream With Passion - Journal Page for Colour Blast

Hello. 
Happy Mothers Day to all the Mum's today! 
 Its Kerry here again with a journal page to share.

I started in my 'Colour and Texture' Journal, which is actually just an old book I found at an op-shop (thrift store).  I had added some washi tape to the pages and then covered in a layer of white gesso.


I added some random stamping using Black Archival Ink as this is permanent and won't bleed if I add water later.

Next I took the 'Dusty Charcoal' paste and an old gift card.  I dipped the edge of the gift card into the paste and used it to apply the paste to the page in lines.


Then I took the 'Deep Water' paste and popped a small amount on my craft mat and added water and mixed well until I had quite a fluid consistency.  Then I painted the mixture across the middle of my page and allowed the drips to run down the page.
 

I dried the page off a little and repeated the same water mixing step with the 'Royalty' paste.  I let the drips run in both directions and added a few splatters as well, then I dried the page thoroughly.

I grabbed the 'Bling and Leather' pastes and ran them together through a stencil to add a little more texture to my background.


 Using the same gift card application technique from earlier, I picked up some of the 'Bling' paste and used it to accent the 'Dusty Charcoal' lines I had made earlier.  I inked around the edge of the page with 'Black Archival Ink' and also highlighted the edges randomly with the 'Bling' paste.


 I added a few quote stickers and some bling and microbeads to finish it off.


Thanks for stopping by :)