Sunday 30 April 2017

Spread Your Wings and Fly for Lindy's Stamp Gang and Stampotique

Hello Lindy's fans!  Today's post was so fun to make and a little bit different from the usual posts.  It combines the FABULOUS Lindy's Magical Shakers with the AWESOME stamps from Stampotique, so lets get straight in to it!!


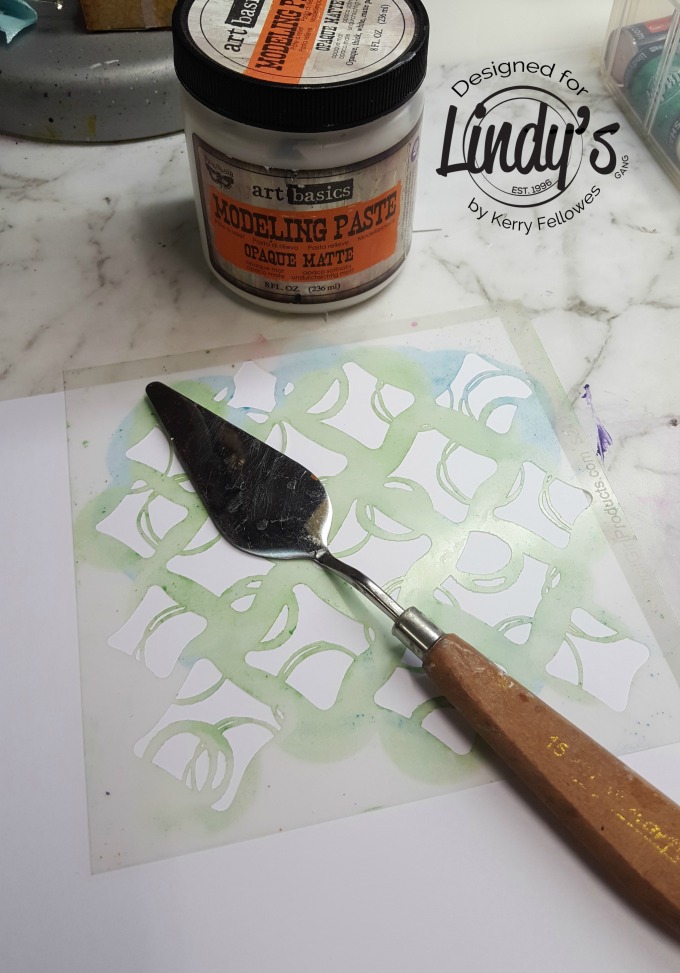
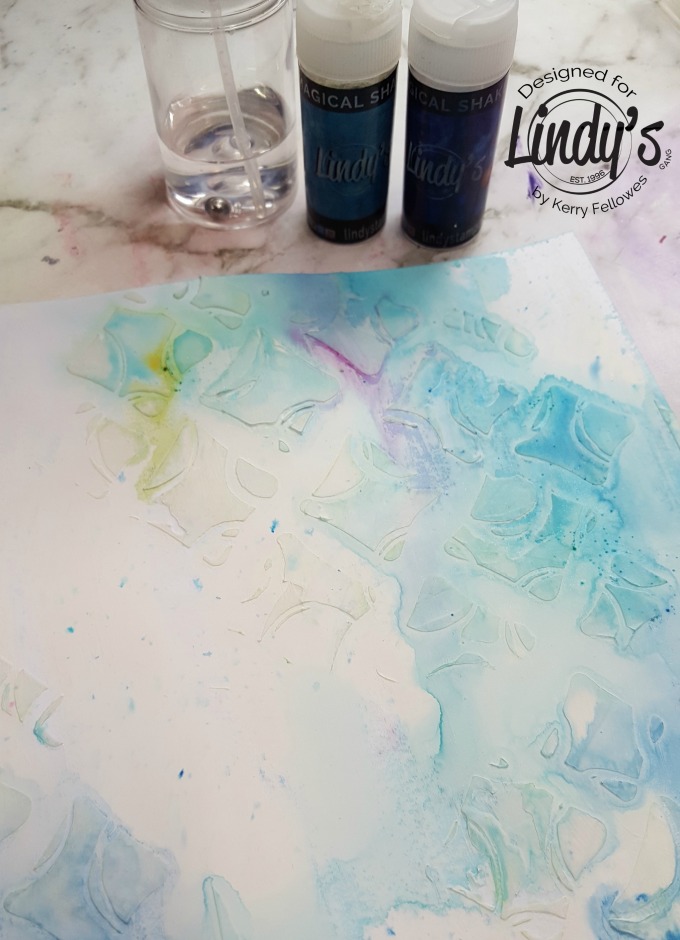
I have applied some modeling paste through a stencil onto regular cardstock to add texture.
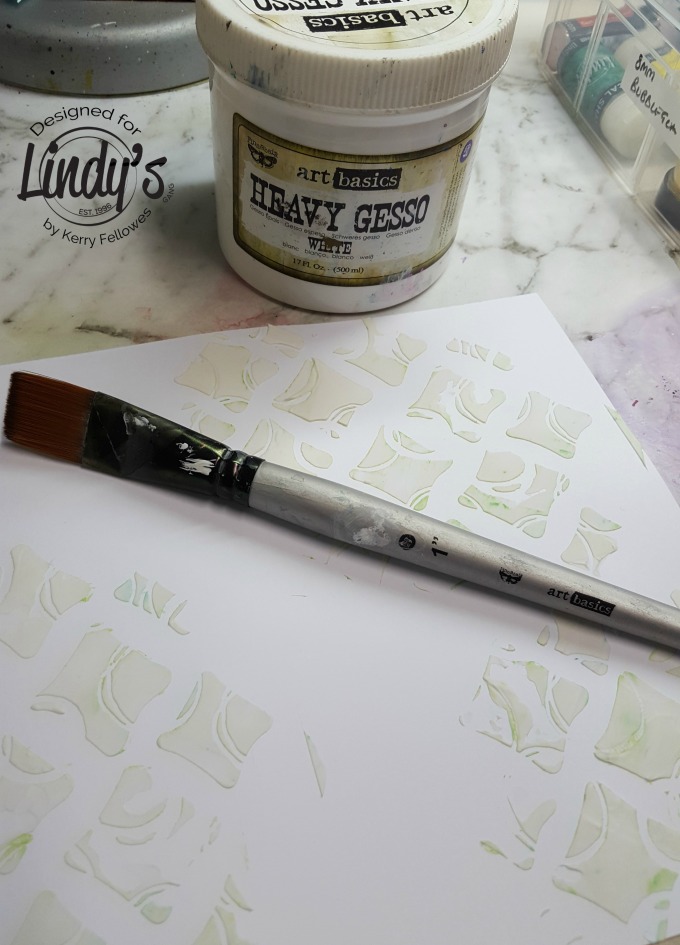
angel boy 1 


Once the modeling paste is dry I have painted over the top with white gesso in a random fashion making sure to still leave some parts of the card without gesso.

angel boy 2 


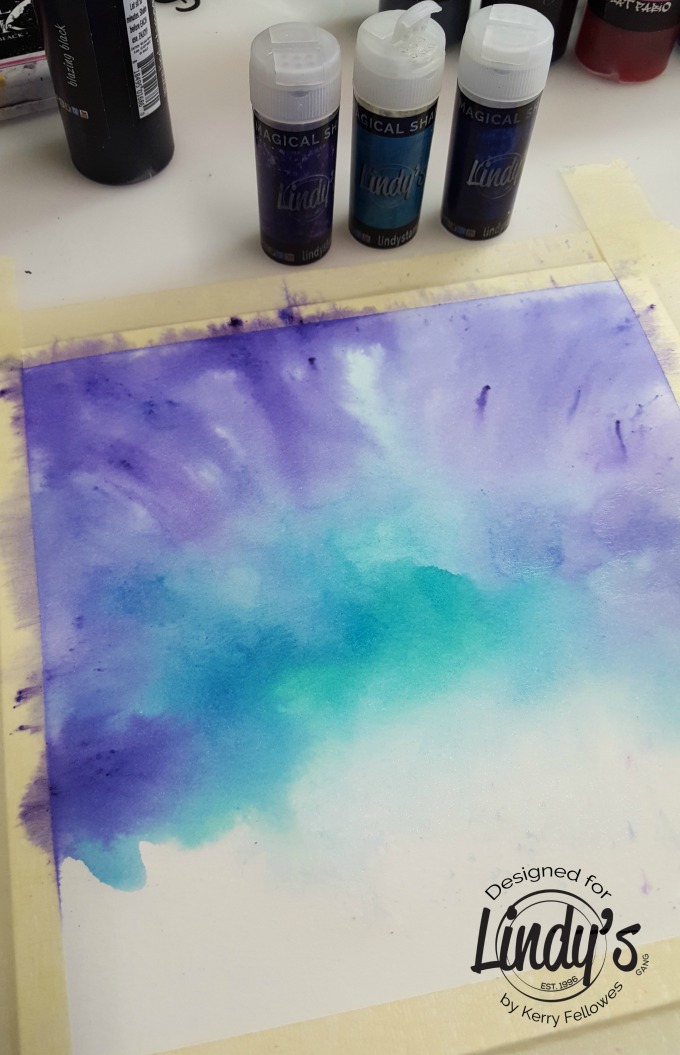
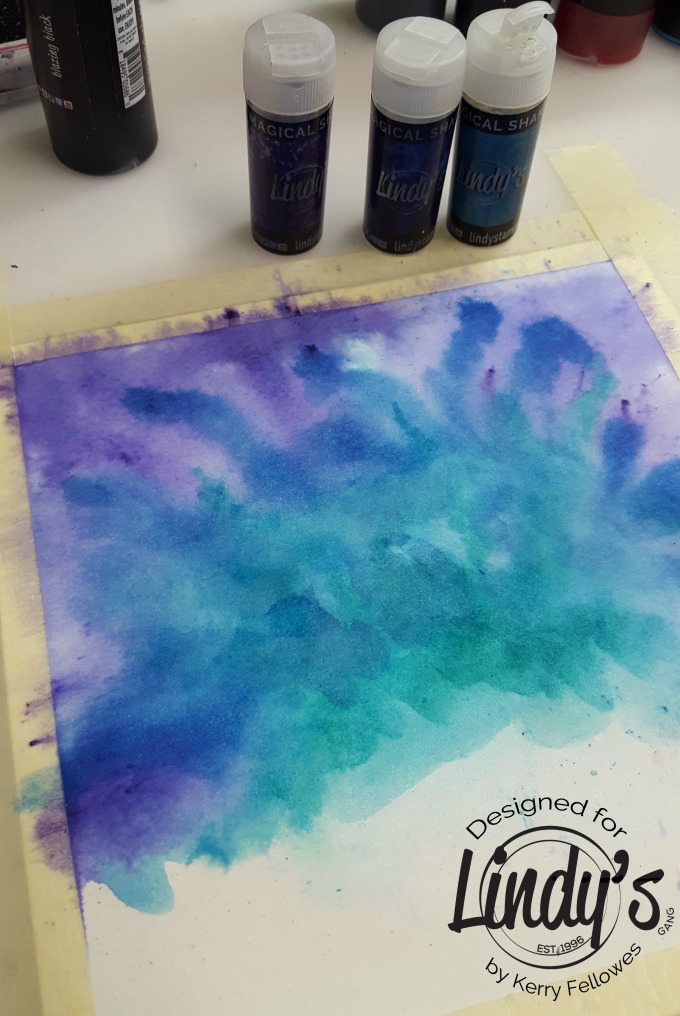
Sprinkle a tiny amount of the Magical Shakers in Guten Tag Teal and Bavarian Blue and activate with water.  Allow the colors to move around and mingle together then dry off thoroughly and set aside.

angel boy 3 


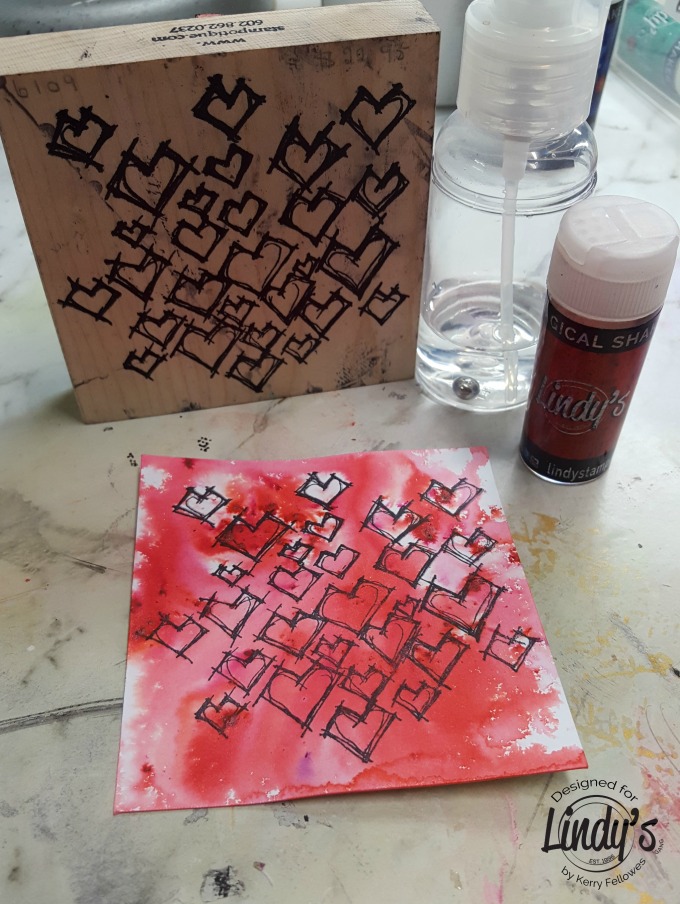
On a separate piece of cardstock, I have stamped the Stampotique stamp 'Daniel's Hearts' in Black Archival Ink and sprinkled a small amount of Magical Shaker in Cuckoo Clock Cardinal and activated with water.  Once dry, I have fussy cut a few of these hearts out to add to my project.

angel boy 4 


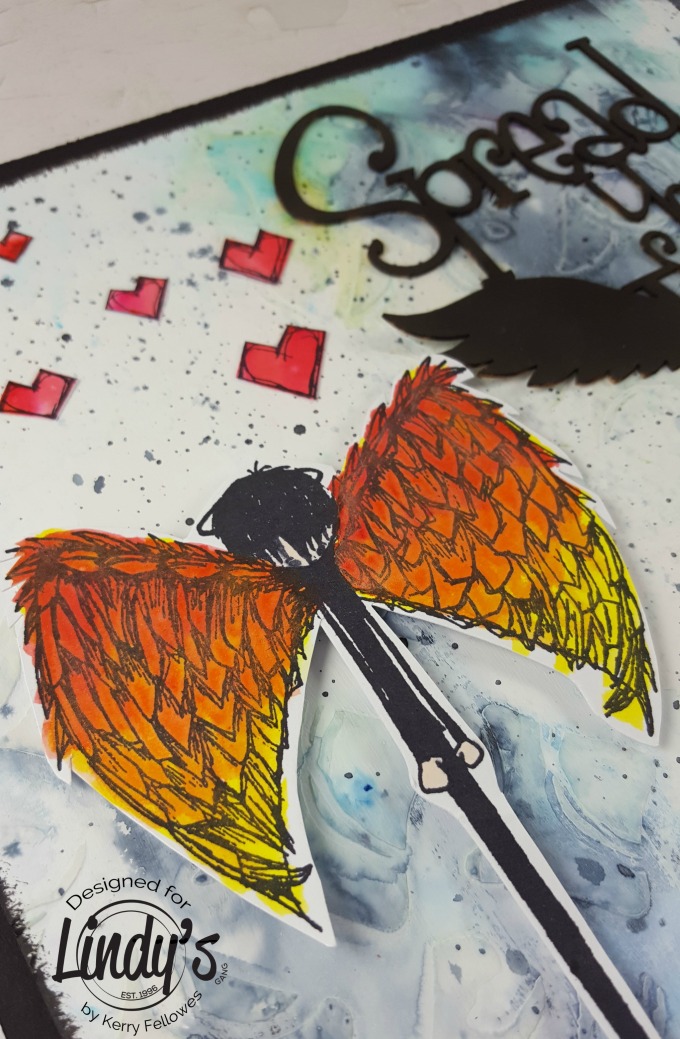
I have stamped the Stampotique 'Angelboy' stamp using Black Archival Ink  onto a separate piece of cardstock and using a waterbrush and the Magical Shakers in Yodeling Yellow, Oktoberfest Orange and Cuckoo Clock Cardinal I have colored his wings... ahhh *sigh* I just love how vibrant the Magical Shakers are... don't you? I coloured his hands and face with a flesh colored copic marker and then 'not so fussily' cut him out and attached him to my page using foam tape to pop him up a little bit.

angel boy 6 


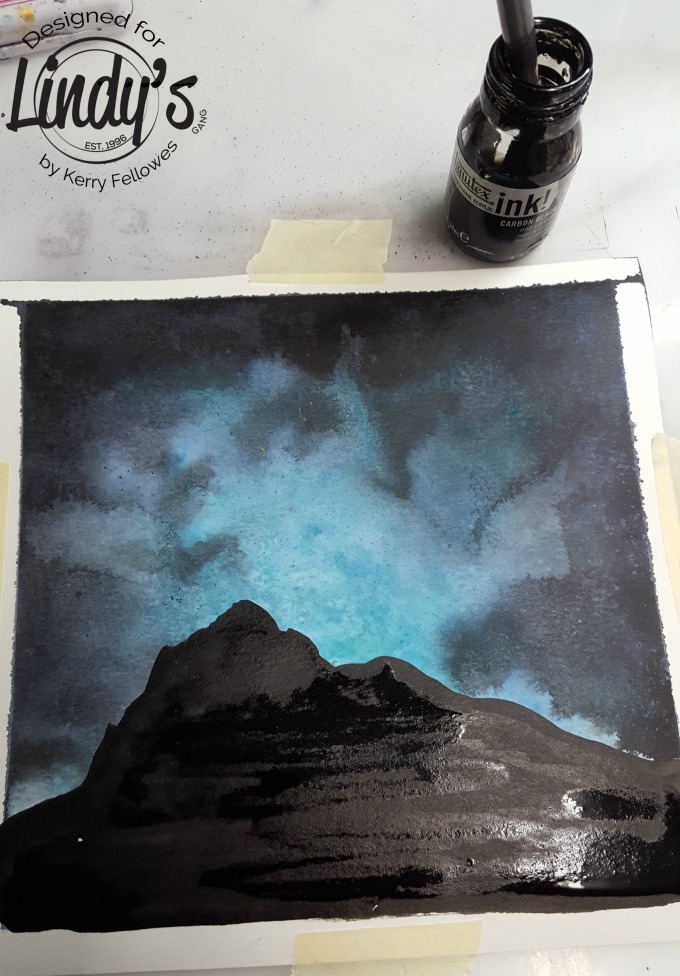
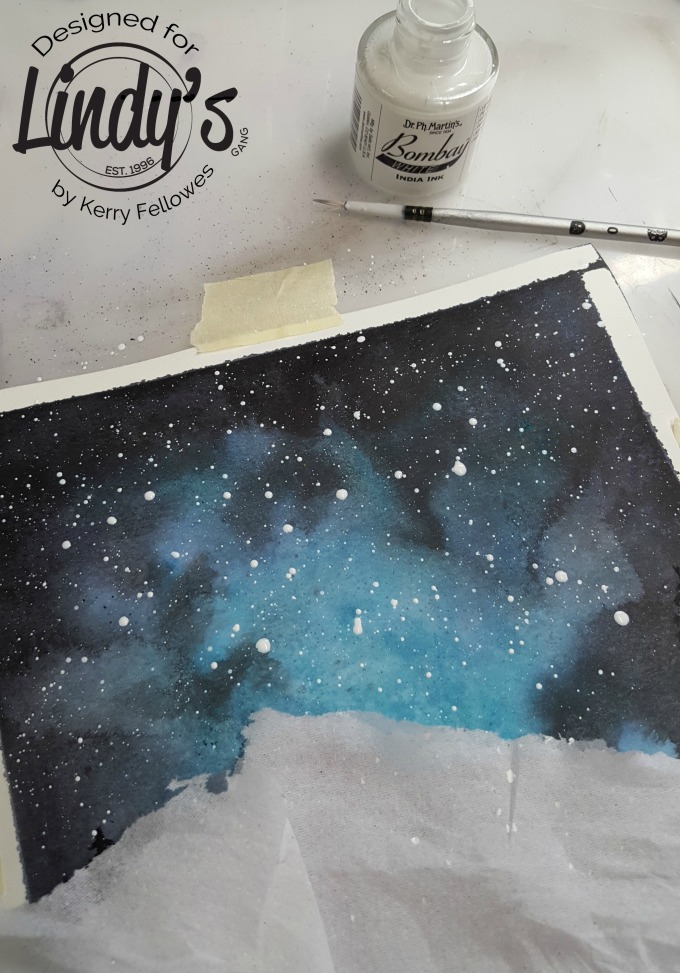
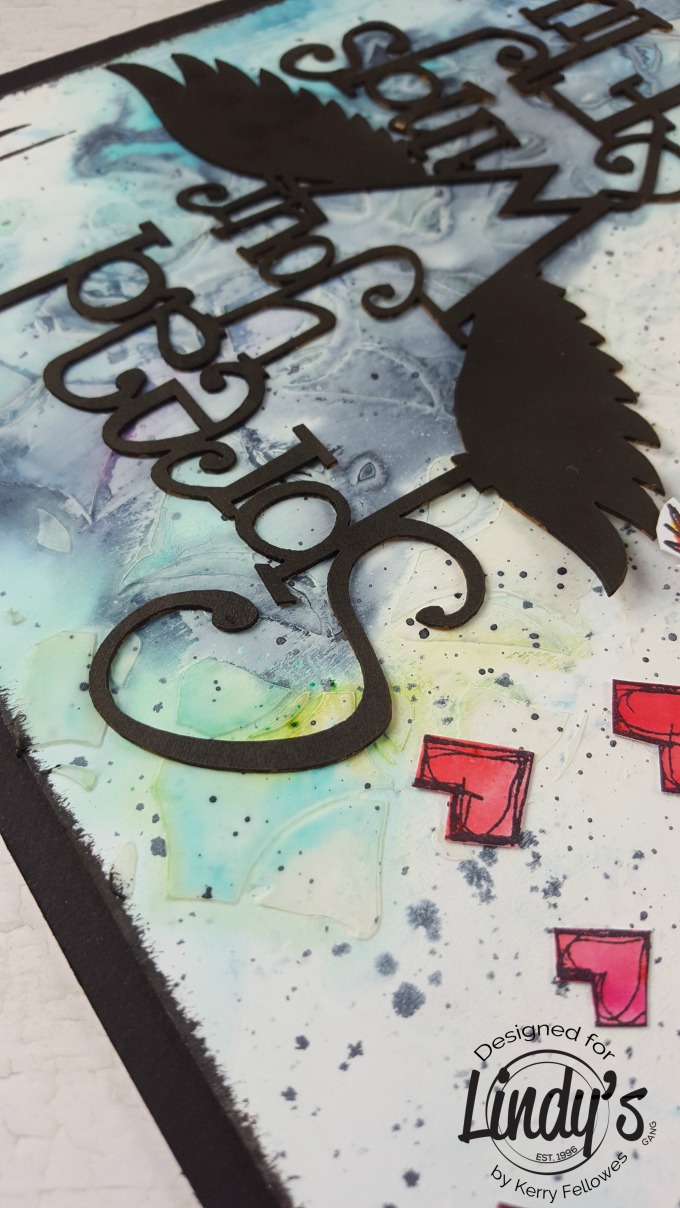
I used a small amount of the Magical Shaker in Black Forest Black with a brush and quite a bit of water to the textured parts of the card and to add some splatters. I used black soot Distress Paint to color my chosen chipboard title and add a few 'marks' to my page. Once the title and hearts are adhered I have mounted the page onto some black mounting board and we are done!

angel boy 5 


You can find all the links below to both the Lindy's products and the Stampotique stamps, I advise you to grab a cuppa, both of these places have and ENORMOUS amount of amazing products to choose from, there is something for everyone!

angel boy 8 


I have a process video below, thanks for dropping by and have a 'Magical' day!!


Products used:
Stampotique: 'Daniel's Hearts' , Angelboy
Other Products: Black Archival Ink, Whichcraft Chipboard, Modeling Paste, White Gesso, White Cardstock (250GSM), Black Mounting Board, Black Soot Distress Paint, 3D Foam Tape.

Monday 17 April 2017

Never Change for Artified

Hello.  Its Kerry here today and I am so excited as today I get to play with a bunch of NEW products that we all got to drool over from the CHA or Creativation videos from January. Without a doubt the stand out product for me from all these new releases were the Distress Oxide Inks.  They are completely different from any other inks I have played with, so lets get started! 

I have taken a piece of 300gsm watercolor paper and cut it into a tag shape. I took some Distress ink in Cracked Pistachio and 'smooshed' it onto my craft mat and sprayed both the tag and the ink with water.  Using a brush I dabbed and flicked the ink onto the tag leaving plenty of white space.


 I did the same again using Broken China Distress Oxide remembering to leave some white space.  


Using the Fossilised Amber I have added some ink around the edge with a sponge. I have added a few splashes of water to the tag and then lifted some of the colour off with a paper towel.


Repeat the  process again with Vintage Photo Distress Oxide and that completes the background.


Another item I was really impressed with was the Tim Holtz Paper Dolls.  The package is huge and there are all shapes and sizes in the pack.  I picked out these cute little girls and wanted to give them some wings.  I stamped the butterfly from the Carabelle Studio Believe in Magic stamp set and coloured them with the Distress oxide Inks in Worn Lipstick and Fossilised Amber.  I cut them in half and stuck them onto the back of the paper dolls.


I added a little bit of random text stamping to the tag to add some interest to the background and then used some of the NEW Tim Holtz Design Tape to 'ground' the Paper Dolls.


 To finish off the tag I have coloured some seam binding with Distress Oxide Worn Lipstick and Spiced Marmalade.  I placed the seam binding on my craft mat then just added the Distress Oxide on top and activated with water, I scrunched the seam binding as I dried it to give it a crinkled look.  I repeated the process with the Cracked Pistachio and Broken China Distress Oxides on a separate piece of seam binding.


And last of all I have adhered some Chit Chat stickers for my sentiment.


You will find links to the products below:
- Distress Oxide Ink Pads
- Distress Oxide Refills
- Tim Holtz Paper Dolls
- Tim Holtz Design Tape
- Carabelle Studios Believe In Magic Stamp
- Chit Chat Stickers

The Distress Oxides are unique as you can layer the colours one on top of another and as long as you dry between layers you can get some AMAZING effects.  I will add a couple of extra pictures at the bottom of this post of some 'Rust Paper' I made using the Distress Oxides and a link to the video on how they were made :) 


 Thanks for dropping by :)


Perhaps They Are Not Stars - for Lindy's and Stampotique

Hello, It's Kerry here today.  Today's project is super quick and easy for anyone to do, the best part about it is there is no right or wrong way to do it and the result will always be different.  You will need some Magicals, I have used the Magical Shakers, but you can use any of the Magicals from the Lindy's range and you will also need the amazing quote stamp, Perhaps They Are Not Stars,  from Stamptique.
To start, take a piece of watercolor paper and tape it to your work surface, this will help the page stay flat as we add water.  Then sprinkle your Magicals on to the paper, I have used Guten Tag Teal, Bavarian Blue and Polka Purple. Keep the lightest color towards the middle and darker colors more to the outside edge.  Apply water to the paper with a water sprayer and let the colors mix a little bit and dry off.

Not stars 1


Repeat the process to intensify the color and use a paint brush to drag the colors into each other and dry off again.

Not stars 2


Once dry, add a little of the Blazing Black Spray just to the outer edges and let it move inwards slightly with the help of some water.  If you don't have the spray, you can use the Magicals in a dark color in the same way or even a black ink.  To create a very dark silhouette, I have used Liquitex ink in Carbon Black, but again, you can use what you have (ink, paint etc).  I created the top edge of the 'mountain' first, then colored in the rest once i was happy with the outline.

Not stars 3


I have added a couple of tree silhouettes using the same ink and a paint brush.

Not stars 4


To create the stars, I have used a piece of torn paper towel to 'mask off' the area where I do not want the stars to appear.  Then using a fine brush and some white ink, I have added some splatters.

Not stars 5


Allow everything to dry thoroughly then using versamark (or any other embossing ink), stamp the quote onto the mountain and apply Lindy's Purely White embossing powder over the stamped image and heat set.

Not stars 6


To finish off I have added a few highlights to the trees with a gel pen, trimmed down my panel and added it to some white mounting board.  I really love the quote, such a beautiful way to look at the stars.

Not stars 7


Stampotique Stamp: Perhaps They Are Not Stars
Other Products: Watercolor Paper, Black and White Ink, Versamark, White Gel Pen, Water, Brush, Mounting Board